Sunday, November 27, 2011

Cake in a Can

Cake is my favorite food. In any shape. In any flavor. Cakes me supremely happy. Supremely. Now that's happy.

When working on my kitchen gifts class for nourish I came across some inspiration via Martha. Big surprise. Cake in a can. Come on.

I also love to recycle tin cans. Remember? How does she get into my head?

Could cake in a can get any better as a sweet gift? Yes. There is beer in it. We're so in tune - Martha and I.

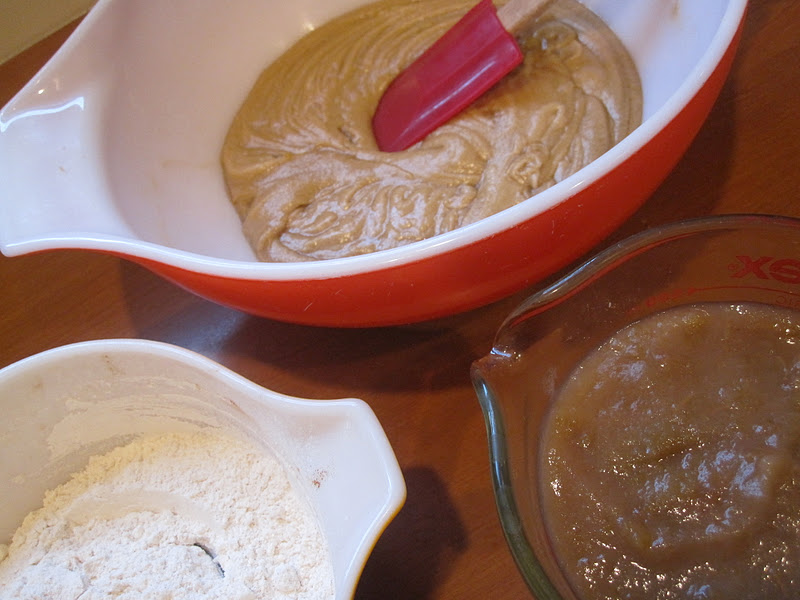
Simple would be an understatement. An easily  tossed together quick cake full of pantry spicy goodness...and stout. Generously buttered 19oz. cans are the baking vessel.


In my excitement to do this project, I grabbed 4 pop-top cans of soup. Without thinking, the proper size was procured but see that little rim? Trouble.


When I explained my situation to my dear in-need-of-distraction-friend Kelli, she directly asked, "Will they come out?" My direct response was "I have no idea."  Long story short they did not and it didn't matter much because I dug them out and ate them anyway. Call it a purposeful illustration for class attendees. Call it an unthinking oversight. Whatever. It's cake.


Per Martha the cakes are removed from the cans, the cans washed and dried and then the cakes are returned to the can for giving. The show must go on and I made my tasty cakes darling for giving. A simple parchment circle punched with a $1 star stamp with a bright green rubber band to secure it. The other can I wrapped in scrapbook paper and placed in a cello bag with a cute handmade tag.

Let's return to the issue of cake. This cake tastes like Christmas. If there were an official taste of Christmas this is it. Really. Plus it's cake. AND it's baked in a can.

First, buy the right kind of can.

Then, read this great blog by a baker with cans of the right size.

Happy Christmas Cake!

Wednesday, November 23, 2011

The Roots of the Garden

During our last Midwestern warm spell, I spent some time in the garden. I treated myself to the digging of my first parsnip. It was humongous - freakishly so but I'll proudly eat it anyway. This is the first time I've ever grown parsnips and I am going to leave them in the ground covered with a cozy layer of straw. I love the idea of going out to harvest food from my snow covered yard. Parsnips are an oft overlooked vegetable. Look for them at your local green market. Roast, puree or bake them in bread. Add them to your rotation and I promise you'll be thrilled


My other first attempt this year was celery root. I bought tiny plants, set them in the ground and left them alone. The occassional top off of dirt and that's it. Today I will be bringing them all in where I am sure I will cook them in quick succession. This first dug was a bit smaller than I had hoped. The can get really big and knarly looking. Slipped into a stew or pot of buttery mashed potatoes. Heaven.


Though modest, I am happy with the new additions to my garden this year. I will definitely include them again next year. Until them I will eat.

Looking for something to do with parsnips? Try thinking "outside the recipe box" recipe.

Spiced Parsnip Bread
Something unusual & delicious from Relish

1 1/2 c. all-purpose flour
3/4 t. baking powder
1/2 t. cinnamon
1`/2 t. ground allspice
1/4 t. ground cloves
3/4 t. salt
1 c. sugar
1/2# parsnips (about 2 medium), peeled and finely shredded
1/4 c. walnut or canola oil
1 egg, lightly beaten
1/2 t. vanilla extract
1/2 c. chopped walnuts

Preheat oven to 350 degrees. Butter a 9x5 or 8x4 loaf pan.

Stir together flour, baking powder, cinnamon,allspice, cloves and salt in a medium bowl. In a separate bowl, mix together the sugar, parsnips, oil, egg and vanilla. Slowly stir parsnip mixture into flour mixture. Stir in nuts. Spoon batter into prepared pan.

Bake 55-65 minutes, until a knife inserted in center comes out clean. Remove from oven; cool in pan on wire rack.

Monday, November 21, 2011

Gifts of Love with a Vintage Twist

I love to make kitchen gifts and with every passing year, I buy less and make more. My gifts are anxiously anticipated and make it even more enjoyable to create and package them. This year17 talented people looking for inspiration attended two nourish classes and came away with (I hope) many ideas and the confidence to feed those they love delicious holiday treats.

Though I hope to share lots of my ideas in the coming weeks, I have chosen to start with one of my favorites.
Every year I include a simple chocolate bark recipe. A gift everyone loves and super easy for anyone-regardless of skill level-to make. This year's is dark chocolate, toasted almonds and dried apricots with a sprinkling of smoked sea salt. Sharing this simple yet addictive treat was not the high point, at least not for me.


In this case it's all about the packaging. Rooting through the books at Goodwill, I came across an overly loved copy of Frosty the Snowman and ran to Michael's for a 99 cent half-sized white pencil box. Add to this pairing rubber cement, an Exacto-Knife and a piece of mylar. With some careful cutting the image was dry mounted the lid and covered with mylar to create a frosty (pun intended) look. A few wispy swirls of rubber cement lightly sprinkled with sparkling glitter and Frosty comes to life.

This was my favorite presentation of the year. Combining vintage book images and a decoupage-ish technique - does crafting get any better?

In the end, the recipient has a beautiful keepsake box to enjoy long after the chocolate has affixed itself to the hips. I am sure they'll be especially grateful for the New Year's resolution incentive.

Thursday, November 17, 2011

A Honey of a Cookie

I spend a lot of time baking cookies for my kids' lunch boxes. I ask for requests and it goes something like this:

Me: "What kind of cookies do you want in your lunch boxes this week?"

Ella: "Chocolate chips, extra chips"
Henry: "Chocolate chip, lots of chips."
Doug: "Chocolate chip, few chips"
Max "Chocolate chip"
Jake: "Chocolate chip, no chips"

Last week, getting a little crazy in a stay-at-home-mom way, I went against the grain and resurrected one of my favorites. Honey-Oatmeal.

Honey is as near and dear to my heart as are the dear bees producing it. I have always wanted to be a beekeeper and long story short, after one good year, my inexperienced eye sent my bees to a new neighborhood in search of  more living space. I am not yet ready to throw in my veil but until it's time to harvest yellow house honey, I'll buy from the locals.


It's good for our environment, our food system and our personal health. Honey is a great source of antioxidants and a beneficial antiseptic. Think of local honey is an allergy shot increasing your body's ability to fight allergens most prevalent in your neck of the woods. Preventative medicine in a cookie. I always knew it was possible.

By the way, this cheap kitchen gadget is the only way to measure sticky ingredients. Get one.


The recipe is easy and offers stellar results. It can be made without thinking or while talking on the phone, adding to the every growing/never diminishing to-do list or listening to what seems like the 100th time Lance Armstrong visits Elwood City.


If I were a better food blogger, I'd have step-by-step photos illustrating a properly softened stick of sweet cream butter.  Documentation of the technique to utilize for exquisitely creaming said butter and notations on the virtues of weighing flour.

I am not though.

I am just a mom making lots and lots of cookies.

Honey-Oat Cookies
1 1/2 c. sugar
3/4 c. butter
2/3 c. honey, preferably local
2 eggs, lightly beaten
4 c. rolled oats
2 c. all-purpose flour
1. baking soda
1/2 t. salt

Pre-heat the oven to 350 degrees.

Whisk dry ingredients together.

In the bowl of stand mixer beat butter, sugar and honey together until fluffy. Add eggs and beat well.

Stir in dry ingredients til combined.

Scoop balls of dough about 2 T. in size onto a cookie sheet about 3" apart.

Bake 9-11 minutes. (watch Francine ride her bike)

Cool on sheet pan several minutes before moving to a rack to cool completely.

Monday, November 14, 2011

Henry's 8th Most Important Picture

We had Henry's party on Saturday evening. Henry requested  "ground beef" tacos. Mommy and Daddy added some chicken, a pot black beans, Spanish rice and lots o' guac. Of course, the ubiquitous chocolate birthday cake I've made for the last um-teen birthdays in the yellow house was served. The chocolate frosting was this one, covering the last um-teen birthday cakes. I am hoping someday, they'll break out of the mold.

Henry thoughtfully decorated his chocolate cake with chocolate frosting using Han Solo, Princess Leila and Yoda picks. Nice to have them in attendance.

And, of course, regardless of what I cake I bake (over and over and over) I am blessed to celebrate each and every one of them.

Happy 8th Birthday, H.D!

Homecoming 2011

The end of September was Homecoming. Jake took a girl he's known since kindergarten. I told him a year or two ago someday he'd take her to a dance. He told me that was gross - like dating your sister. Amazing what a mother knows.


To save the kids from a meal at Olive Garden (or maybe saving Olive Garden from the kids) we offered to host a dinner for everyone. I was thrilled they were thrilled and set about planning a buffet of heavy hors d'oeuvres. (old caterers die hard)


I wanted the table to look lovely and be a bit more formal than a usual gathering of friends. I didn't want it to be intimidating either. No girl wants to worry over things like this while hoping not to fall off her heels.


For the menu, my hope was to settle on the fine line of teen-friendly but new. Food not foreign, and recognizable but not typical. Grilled chicken skewers not nuggets. We made three dipping sauces to appeal to all palates. There was a crudite platter. The teeny-tiny potatoes were roasted with Rosemary-Orange Salt.


Since I adore cheese and feel a beautiful board should be part of any entertainment plans, I went out on a limb. Suffice it to say it looked just like the photo even after the mass of teens hit it.


There was dining and mingling and conversation.


They all had a great time and I loved having "my" boys around and getting to feed them all.

The only thing I can't figure out is how in the hell they can be in high school.

Friday, November 11, 2011

Hipstamatic Henry

Though I know I am far behind, I've finally installed Hipstamtic onto my phone. I love old photos - even of people I don't know (check out my website). Making today look vintage makes me very, very happy.

Last weekend, as we approached Henry's 8th birthday, he wanted to lie down with me before going to his own room. Really, who am I to say no? It means he will fall asleep and poor Doug will carry him off to bed - forty pounds of dead weight - before climbing into bed himself.  He is a patient man. As my children get older, my idea of "cuddly baby" gets larger so I make this work. Call it adaptation. After he drifted off, just before the baby snores started, I snapped some pics. (okay, maybe like 20 or 30)


In my mind he's still only two.

Thursday, November 10, 2011

Needed: Recycled, Weather-Proof Ornaments

Thanks to my 2nd grade wolf scouts I have been challenged to get my craft on again. I realized three days ago yesterday's meeting was the only opportunity for the boys to make ornaments for the pack tree down on the Riverwalk. Our next meeting as after the tree lighting so I had to channel my inner Martha - or my inner Martha staff member - fast.

Since our focus this month is on the environment, I wanted the ornament to work into that theme in tandem with the broad scouting theme. Back to the felted sweater collection for up-cycyled and weather-tolerant ideas.


With the help of a few online templates I came up with what the kids and I decided (hoped) looked like a wolf. Max's idea of the neckerchief completed the look.


My pale yellow thrift store score worked as a neckerchief. I wish it was gold. Can you say com-pul-sive?


A brownish-gray sweater lent itself to wolf fur. The charcoal gray be came noses.


I was lucky I only had to make eight though the cutting took far less time than I had anticipated - even with crappy scissors. I hid my beautiful sewing scissors so the kids didn't confiscate them for ridiculous things. Now I can't remember where I put them.

Parts in order. The original button eyes concept became big black sequins - glinting wolf eyes. Again, the fabulous Max suggested a golden sequin to act as a neckerchief slide. Pre-threaded embroidery floss allowed the boys to string a hanger on easily.


Tiny patient fingers used weather-proof glue to apply the eyes, nose and slide. I found the neckerchief required a quick whip stitch across the back to secure it. Not even a big deal for the sewing challenged leader.


The final product.


I am pleased with the final result and I love how all aspects of the achievement at hand were tied together (though I am mostly likely the only one present to have noticed). I love a good connection.

Onward to the next project. Wad of shrunken sweaters under my arm.

Martha's staff has nothing on me.

Wednesday, November 9, 2011

An Exception To The Rule

I will start this post with a few personal statements of fact.

#1 - Food should only be the color nature intended it to be. Treats made with marshmallows and cereal should not be blue or green. Frosting shouldn't be violet.

#2 - Food should not be shaped into weird things. Cookie cutter sandwiches, okay. Lamb-shaped butter, molded meat, weird.

#3 - We pack a lot of lunches in the yellow house.

#4 - Bento boxes are cool.

#5 - There are always exceptions to every rule.


The above product was recently found on the shelves of one of my favorite kitchenware stores. As a part of my job with said kitchen ware store, I get to try some cool and not so cool products. When the above Egg Design Molds made their appearance, I was sort of grossed out. (see number 2 above)


A still warm-ish peeled hard-cooked egg is placed into half of the mold. The molds look like bears, bunnies, hearts and stars.


The two halves are clipped together pressing the egg into the mold. It's fairly easy to do.


My lovely assistance Ella did all of the work.


The mold with the egg inside is then allowed to chill in an ice water bath. The slightly warm boiled egg when mashed into the shape of a bunny face and iced down emerges....


...a hard boiled egg in the shape of a bunny face.

Now based on a a few of the above statements of personal fact, you may think I am being negative, sarcastic or down-right nasty. You would be wrong.

These delightfully shaped eggs have a place. Inspired by the beautiful cuisine found in a bento box this is a fun way to approach breakfast or lunch for a little one. An ace in the hole for the parent of a picky eater. At the very least envious glances at the lunch table.

My children are passed the age to appreciate an investment in these little tools, but if they were younger I think I would. I encourage this bit of fun for the sake of a healthy lunch. If this were to ensure your child got a good dose of protein in the middle of the day, wouldn't you agree?

Please note: In effort for full disclosure this endorsement comes from a woman with way too many sandwich cutters and mini pie molds.

And if you dye anything weird colors you're on your own.

Tuesday, November 8, 2011

The Baby One is Eight

Today is a big day in the yellow house. Today Henry is eight. Today is Henry's golden birthday.

As the baby of the family he is an especially lucky boy. Beyond doting parents there are three older siblings to shower him with the affection, homework help, treats and older friends to admire.

The child fairly always affixed to my hip for the first five years has grown and developed a wonderful personality. He is patient when I want to monopolize his time.


He has a tremendous sense of humor, is wise beyond his years, a silly second-grader and lover of potty humor.


His mind works very much like Max's. The wheels are always turning and connections are constantly being made. His math skills are sharp and he loves to read. If you think a work ethic can't exist in an 8-year old you've never met Henry. The first to grab his shovel when mulch is deliver (to anyone), he loves to build things and is always up for home improvement projects.

A miniature Doug, he has a wonderful imagination and amazing capacity to remember movie plots and characters. I can't believe this tiny shadow will every top out at 6'2" like his Dad. Oh, did I mention the mile wide stubborn streak?


I've learned a lot from Henry in the last eight years. He's taught me lighten up and that dirty little boy fingernails aren't such a big deal. I appreciate every moment I have with him, with all of them, in a way I wasn't mature enough to before. Hen is a bit of all of us rolled into one. Sometimes a contradiction. Out going, shy. Strongly attached, fiercely independent. Serious, hysterical. Hard-working, unable to put his laundry away.


On the birthday of our little toe-head, I realize the gifts he's given each of us. A constant companion, a playmate, a kindred spirit and someone to be responsible for.

I've learned they don't always need to be carried, there is time for a game of Zingo before school and vacum-sealed jerky sticks can be a birthday treat. (ugh)

Happy, Happy Birthday Henry!

Monday, November 7, 2011

The Mother & Apple Sauce (Cake) Prevail

A week or two ago I made a big batch of apple sauce with a bunch of apples gotten for a steal at an end-of-the-season market. My children love apple sauce so I try to keep it around in season for lunch boxes, morning oatmeal or to add fruit to (or extend) a meal. After making quarts and quarts of applesauce I have used several different methods. Peeling, not peeling, food processor, masher, immersion blender, food mill. All have been well received with no complaining. Most recently, I used a method I can't recall but know I didn't include peeling. I planned to spin it through the Vitamix to see what it would turn into. Stopping just short of completely obliterating the thought this sauce ever had anything to do with an apple, I was happy with the color and flavor. The texture was a bit too silky of my taste but it was an experiment. Truth be told I was not remotely concerned with the small flecks of apple skin. It's never been an issue before. This should have been my first clue it would be an issue.

Of course, I was wrong and after attempting to serve it one more time Doug told me the kids didn't like it because there are skins in it. Seriously? They say when life gives you lemons make lemonade. I made applesauce cake.


Brown sugar, bit of butter, eggs. Some flour, leavening and warm spices. Can you see the skins because I can't.


 I chose to bake it in a Bundt pan because Bundt cakes look special. A bit rough on the top but nonetheless lovely. Though it calls for raisins and nuts - I did without. Can you imagine the consequences of those textural issues?


This recipe from Gale Gand is moist, delicious and simple. Try it for yourself with rejected homemade (or purchased) apple sauce. An autumnal treat from a hometown baker, the kids have been scarfing it down.


HA! Who's eatin' apple skin now?

A mother always prevails.

Sunday, November 6, 2011

Apple-Ginger-Cranberry Pie - Two Ways

Last week I taught a pie making class. I love pie and never make them often enough. In my head it becomes this lengthy process and mess. It's not. It never is. My show/tasting pie was this one...


It's is a William-Sonoma recipe for an Apple, Ginger, Cranberry Pie made for a William-Sonoma class. Can you say Thanksgiving? The recipe can be found here. At class's end there were apples and cranberries leftover. Since I don't like to waste food I decided to make pie at home, too.


And then I thought - since there are many of us why not make two pies? I already had a double crust made, so it was immediately easy to get a case of lazy and not make two more crusts. I didn't have much crystallized ginger left either but always have lots and lots of cinnamon of all types. (if the world is truly ending I am your cinnamon source). I added a sprinkle of ground ginger, too just...because.


A crumb or streusel top pie seemed to be the ticket to pie land. It screams dessert AND breakfast. Some flour, grated butter and brown sugar rubbed together was lovely. More cinnamon and ginger. Some of the ginger was crystallized.


About an hour later I had dessert (to accompany this beef stew) and the next day's breakfast.

The moral (or morals) of the story? Recipes aren't always necessary. Necessity is the mother of invention and can force you to think outside the recipe box. Additionally, crumb toppings are an easy way to throw a pie together quickly. And finally, note that with the addition of vanilla ice cream this pie is pretty much like eating a super healthy breakfast cereal.

Remember this: make pie, be creative, enjoy the process and Wheaties are not the only healthy way to start your day.

Saturday, November 5, 2011

The Inaugeral Fire

Last fall we broke ground on our outdoor kitchen when a big, beautiful stamped patio was poured outside our kitchen door. Doug designed and has worked diligently to build a beautiful L-shaped kitchen. He always shoots for the moon. His design includes a custom-built smoker, gas grill, plumbed sink, wood-fired pizza oven, wood storage, prep space and a fireplace.

Of course, life gets in the way and every home owner knows how it goes with home improvement projects. Progress was slower than we had hoped but the shell is set, mortared and ready for fire bricks.

A few weekends ago, after a bit MacGyver-like techniques the boys were able to build roaring fire in our almost, sort of finished fireplace. We roasted marshmallow and made s'mores with peanut butter cups.

We spent time as a family sans Jake - he's in high school now. We texted him photos to harass him. Hee-Hee.


We put our feet up on the hearth and enjoyed thoughts of what's to come.

We can't wait.

PS-Last year's weiner roast story highlighted my beer. This year it's my running shoes.

Friday, November 4, 2011

The End of The Harvest

With frost on the vine, the season has officially ended. For the most part, the garden has been put to rest but not to bed. There are rows of parsnips, the celeriac to be pulled and the chard is still bright.

Most everything else has been tended to, grown in my yard or not. A bit of concord grape pie filling, several rounds of plums, the peppers and green tomatoes have been pickled. I am hopeful nature has done most of the work on my shelling beans and the pods are dry. I am, however, not above hanging vines in the basement pre-hard frost if need be.

This was our first year growing shelling beans and is often the case with a small kitchen garden, we've probably gathered only a meals worth. Given my obsession with beans I'll take what I can get and hope to make at least one favorite dish with the black beans.


I planted some Christmas Limas, too. Though their numbers are few, they'll make a small but lovely addition to a cozy winter meal.


Come January, when you are putting your garden plans together think about shelling beans. If you have tons of space they can extend your garden far into the winter. If you are short of space, give them a go anyway.

They are satisfying on the vine, fun to shell (in a compulsive way) and tasty in the soup pot.

Thursday, November 3, 2011

Yellow Tomato and Basil Jam/I Love Food In Jars

One night I stayed up late working on a blog I was really excited about. A few key strokes....and it was gone. In the blogshere, never to be seen again. Or so I thought. While tweeking a few things I recently happened to notice a blog written in 2001. In 2001, I had three very busy children 5 and under. To say the house was a "fixer-uper" is generous. If I had a computer I don't know where it was. I had struck gold (or yellow) and found my missing story.

Though no longer seasonal, this humble homage to one of my favorite bloggers needs to be published. If you aren't a food preserver hopefully you'll be inspired. My advice? Remember there truly is no season for canning.

*****

Marisa, the writer of the fabulous blog, Food In Jars reads my mind. Something exploding in the garden? Went a bit nut-so at the fruit stand? No time to search for the the answer to "what should I do?"  Food In Jars saves the day.


Several weeks back the yellow tomatoes were taking over the yellow house. The red ones I could manage but the yellow I am certain were reproducing on the kitchen counter in the night. I love a good yellow tomato but honestly, I prefer a more acidic bite. So while I diligently ate a tomato sandwich every day they were getting the best of me.


Marisa had my answer. Cut, add sugar and macerate for 24 hours in the fridge. I love food projects with easy steps that allow you time to fully commit.


A bit of cooking and brightening with lemon zest.


I can't get better. No, wait - it does. Boat loads of basil growing on plants pressed between monstrous caged tomatoes? The crowning glory.

I told you she was good.

I know it is late but if you get your hands on a bunch of yellows and are sick of fighting the basil you really need to try this it's delicious. It's applications are endless. Or maybe just remember next year when there are illicit things happening on your kitchen.

Did I mention it's Food In Jars?